ContentApp takes the photos and videos you've already shot and turns them into posts for Instagram, TikTok, LinkedIn and YouTube — and helps you keep posting regularly. Here's exactly what happens when you set it up, step by step.
BEFORE YOU BEGINSigning in
ContentApp is invite-only, so the first thing you do is verify your email. You click the link and you're in. If you start signing up twice, it just picks up where you left off rather than showing an error. The setup wizard then saves as you go, so if you close the tab your progress is kept.
STEP 1Tell ContentApp about your brand
You add your brand name, tagline, website, what you sell, a short description, your location and the languages you write in. You can also list any forbidden words it should never use, set a few content rules, and name any people who appear in your content and their role. You can change all of this later in your settings.
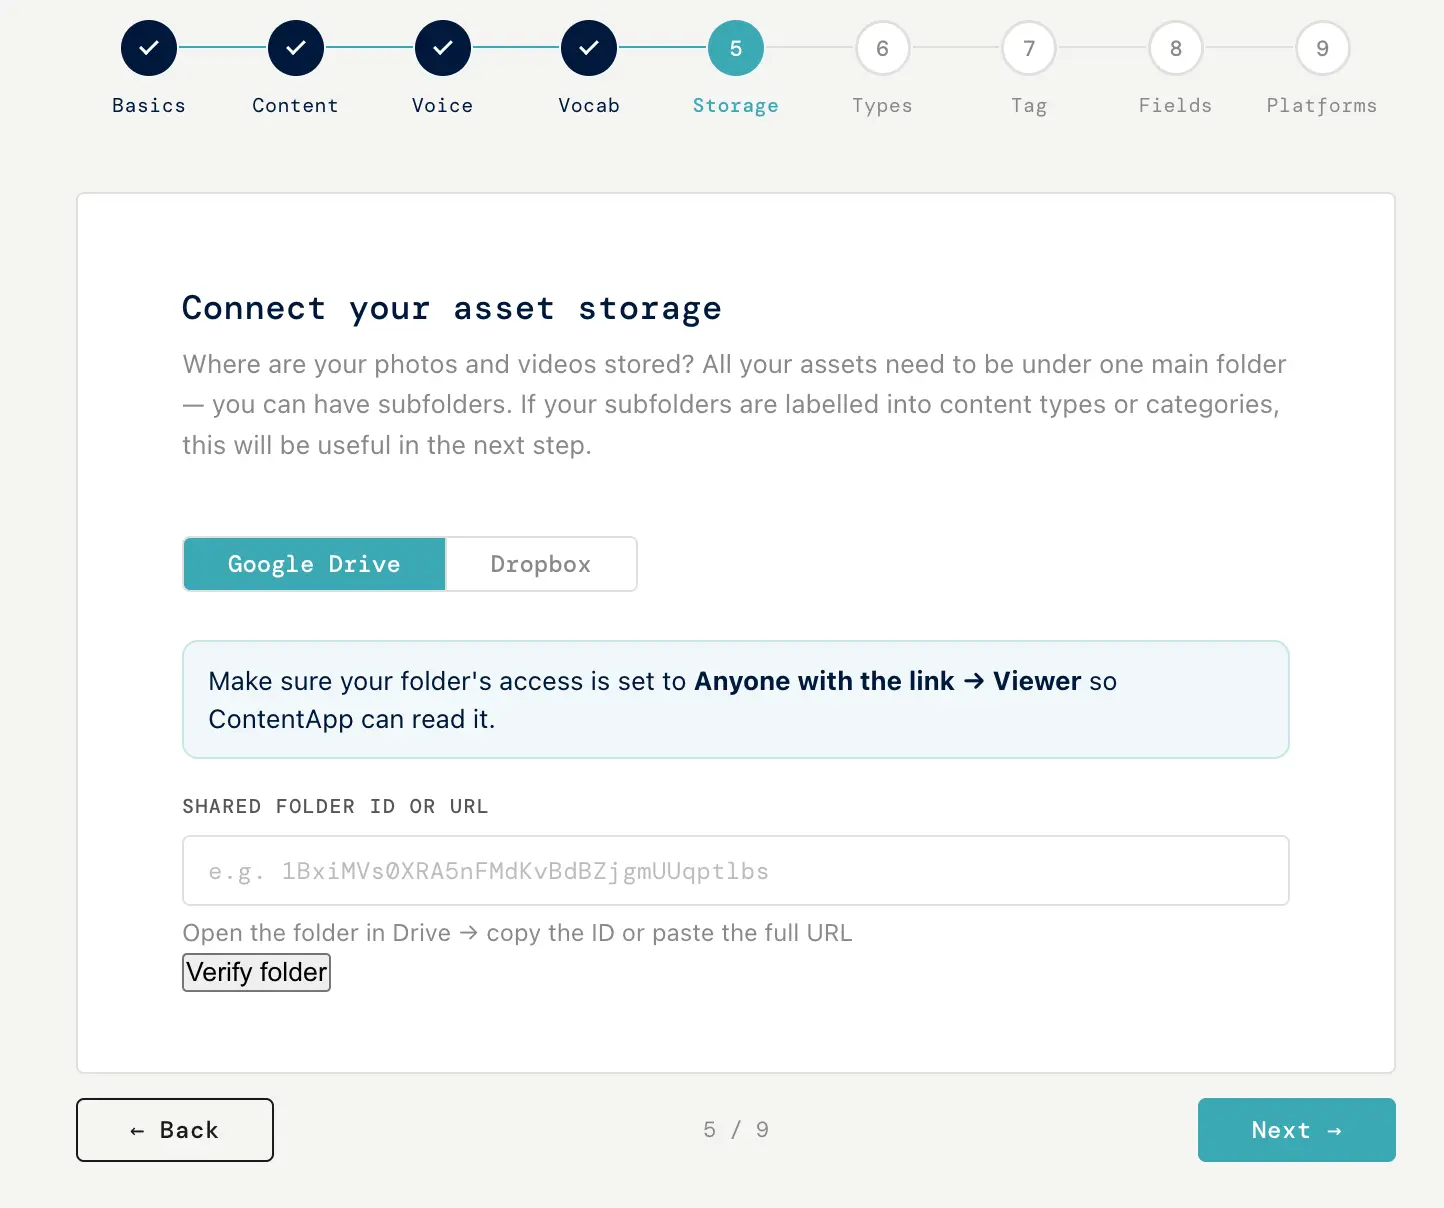
STEP 2Connect your library
You point ContentApp at where your photos and videos live. It's read-only — it never moves, renames or deletes your files. It only reads what's in them, and keeps a note of what each one shows.
For Google Drive, you share your folder with ContentApp and paste the folder link or its ID. For Dropbox, you connect once and choose the folder. Either way, it tells you on screen exactly what to do.
STEP 3Name your content types
ContentApp reads the names of the subfolders in your library and suggests a label for each kind of content it finds (or uses your description if your folders are sparse). You can keep a label, rename it, or remove it. These become the categories you sort by later.
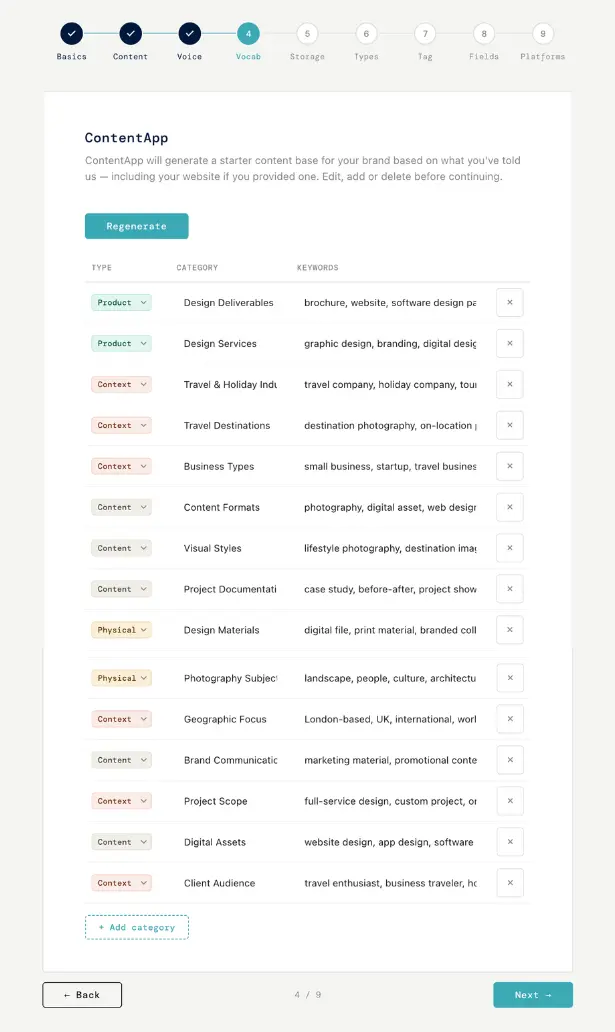
STEP 4Build your vocabulary
This is the set of words ContentApp uses to describe your content. If you gave it your website, it reads the site and drafts the words for you; if not, it works from your description. You can add a word, change one, or delete any you don't need.
STEP 5Tag your library
Now ContentApp reads each file and notes what's in it — the product, the person, the setting, the season, the activity, the moment of use — plus a short description. This is what lets a written idea find the right clip later.
It runs in the background, so you can close the app and carry on. When it's finished, it emails you a link that opens you right back at this step. If you add more files another day, it only tags the new ones.

STEP 6Choose your idea-form fields
From those tags and your vocabulary, ContentApp offers a checklist of filters you can use when writing an idea — and only the ones your library can actually answer. You tick the ones you want. Platform, content type and caption length are always on.
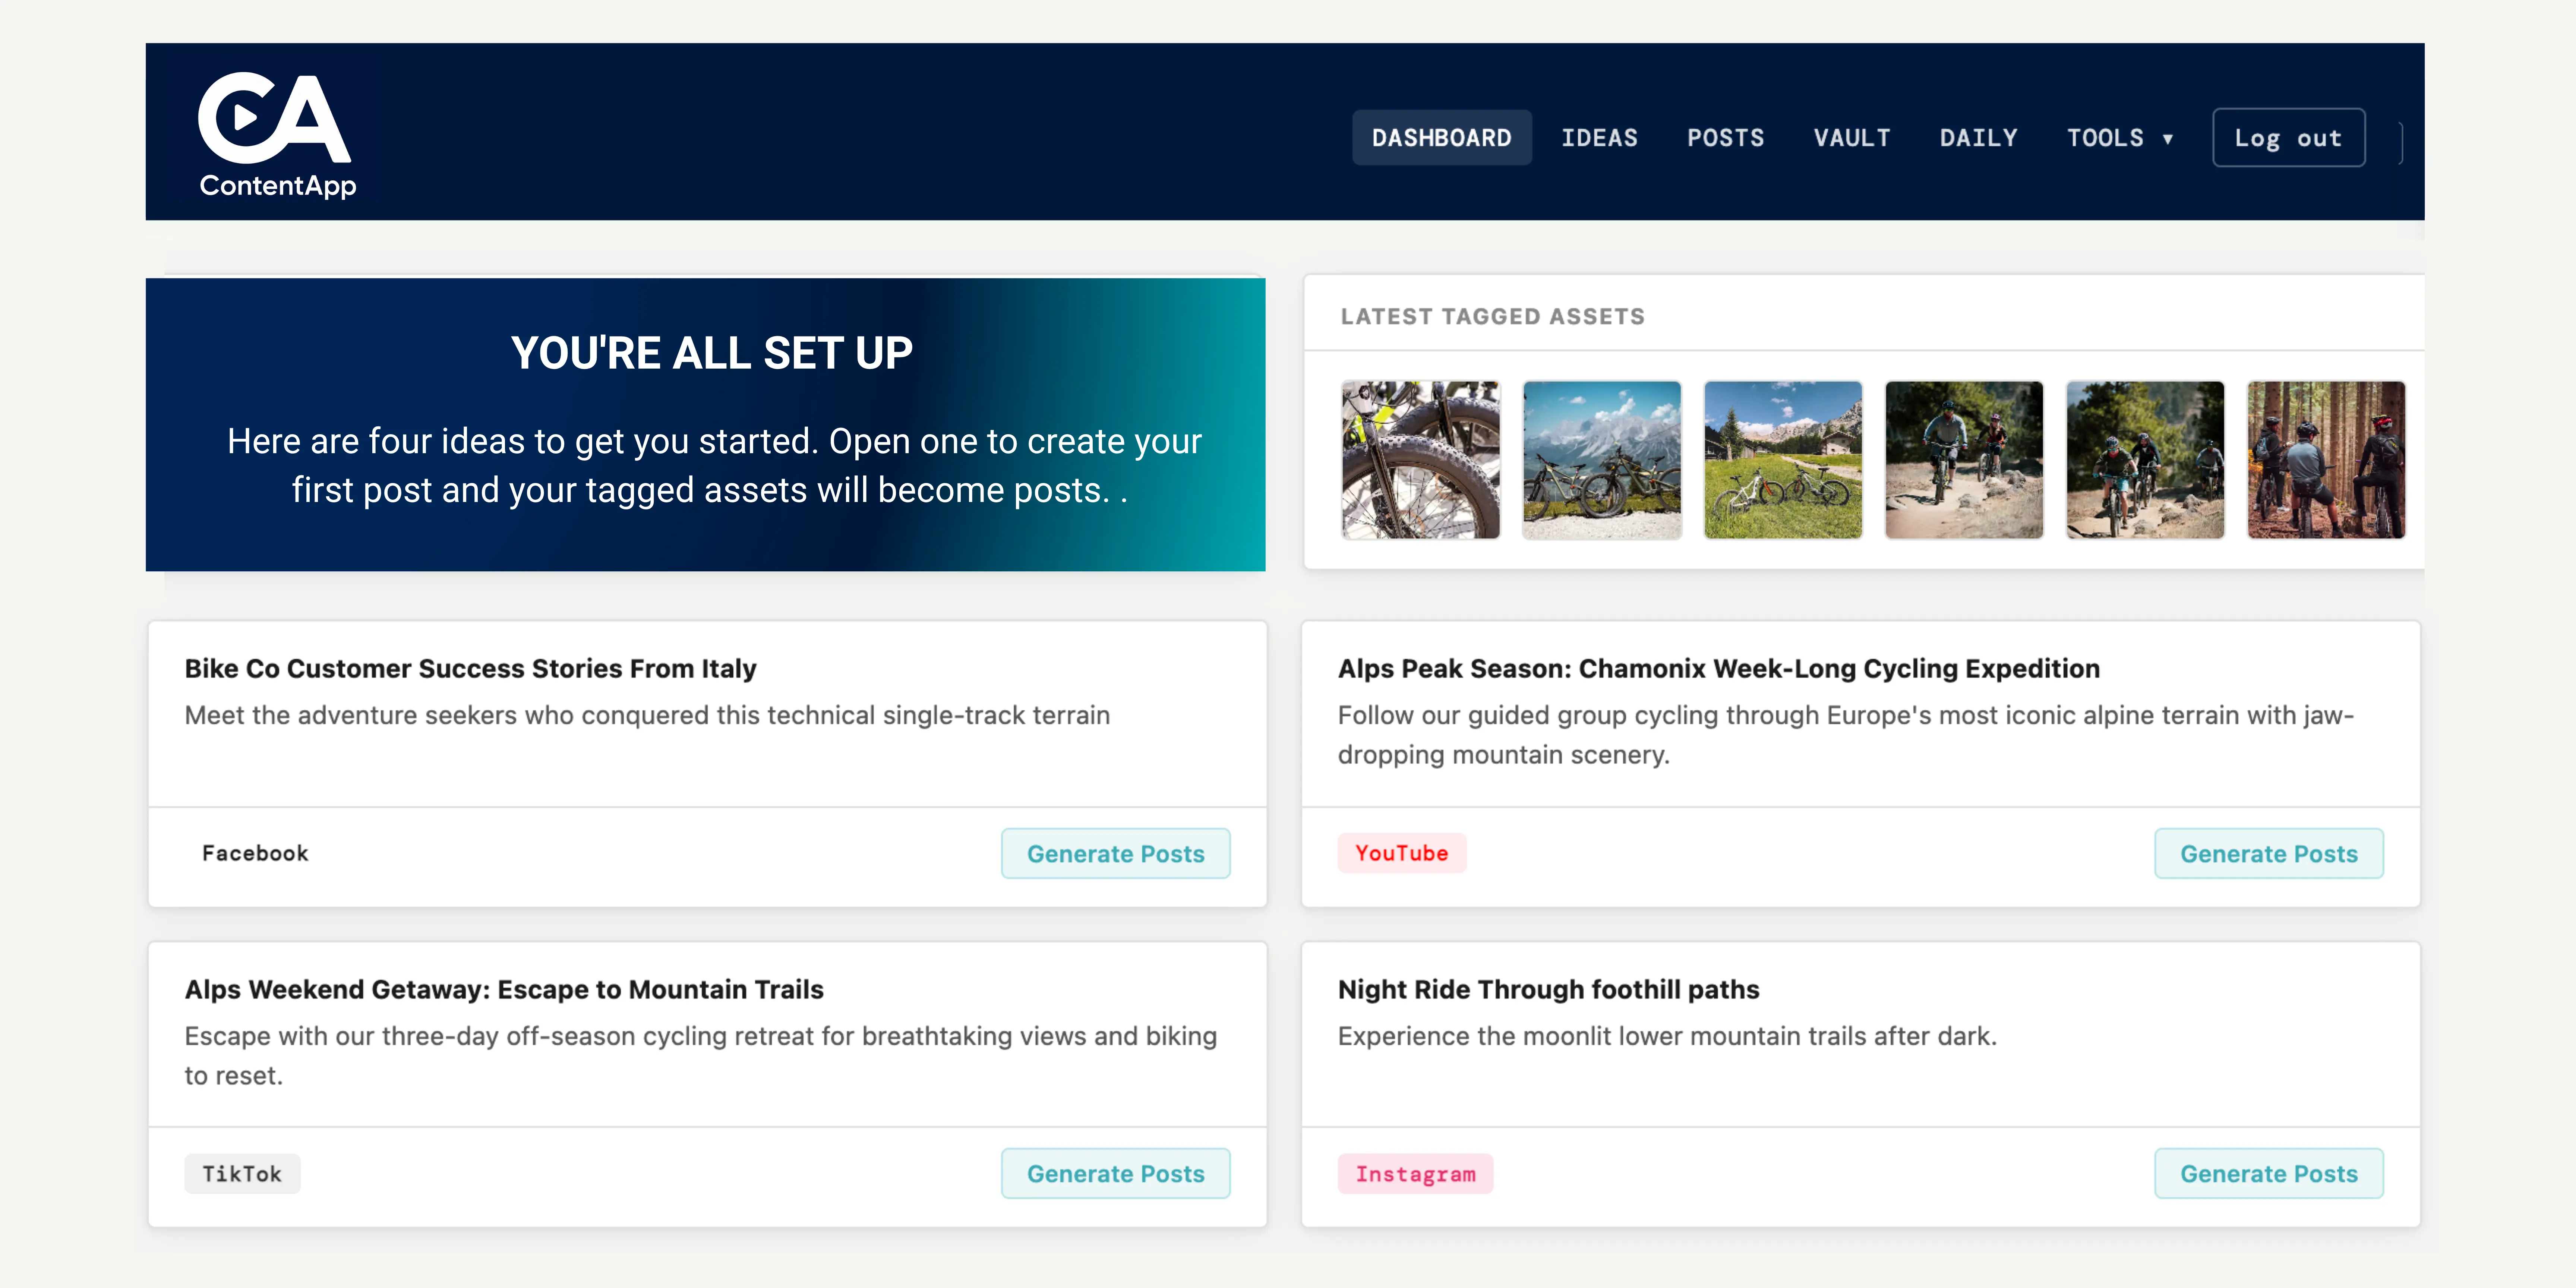
AND THENWhat you get
When you finish, ContentApp saves everything, sets up how each platform should sound, and writes you four starter ideas so you don't begin on a blank screen. Your dashboard opens with a short welcome. You can use a starter idea, change it, or write your own.
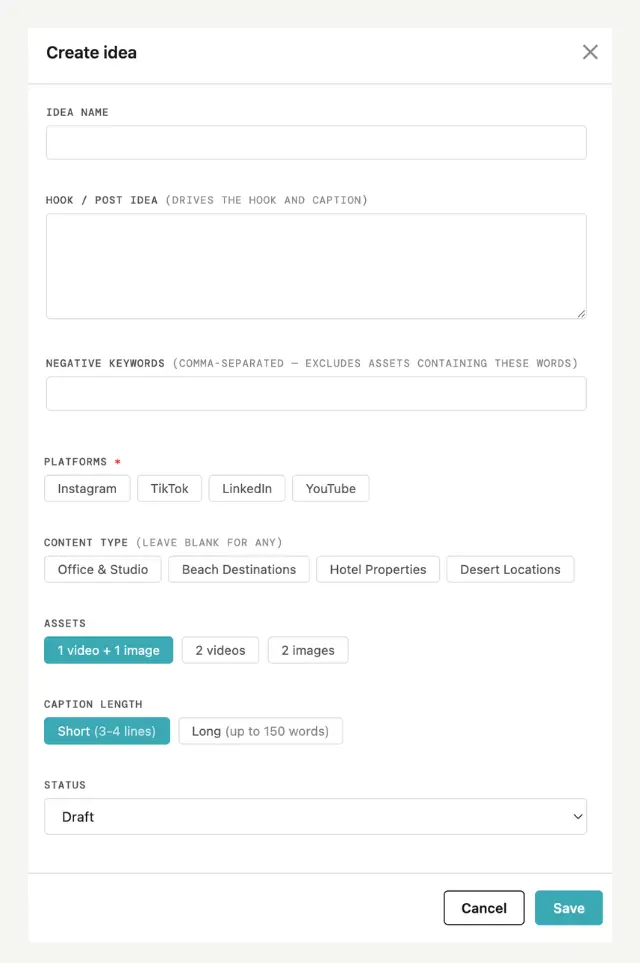
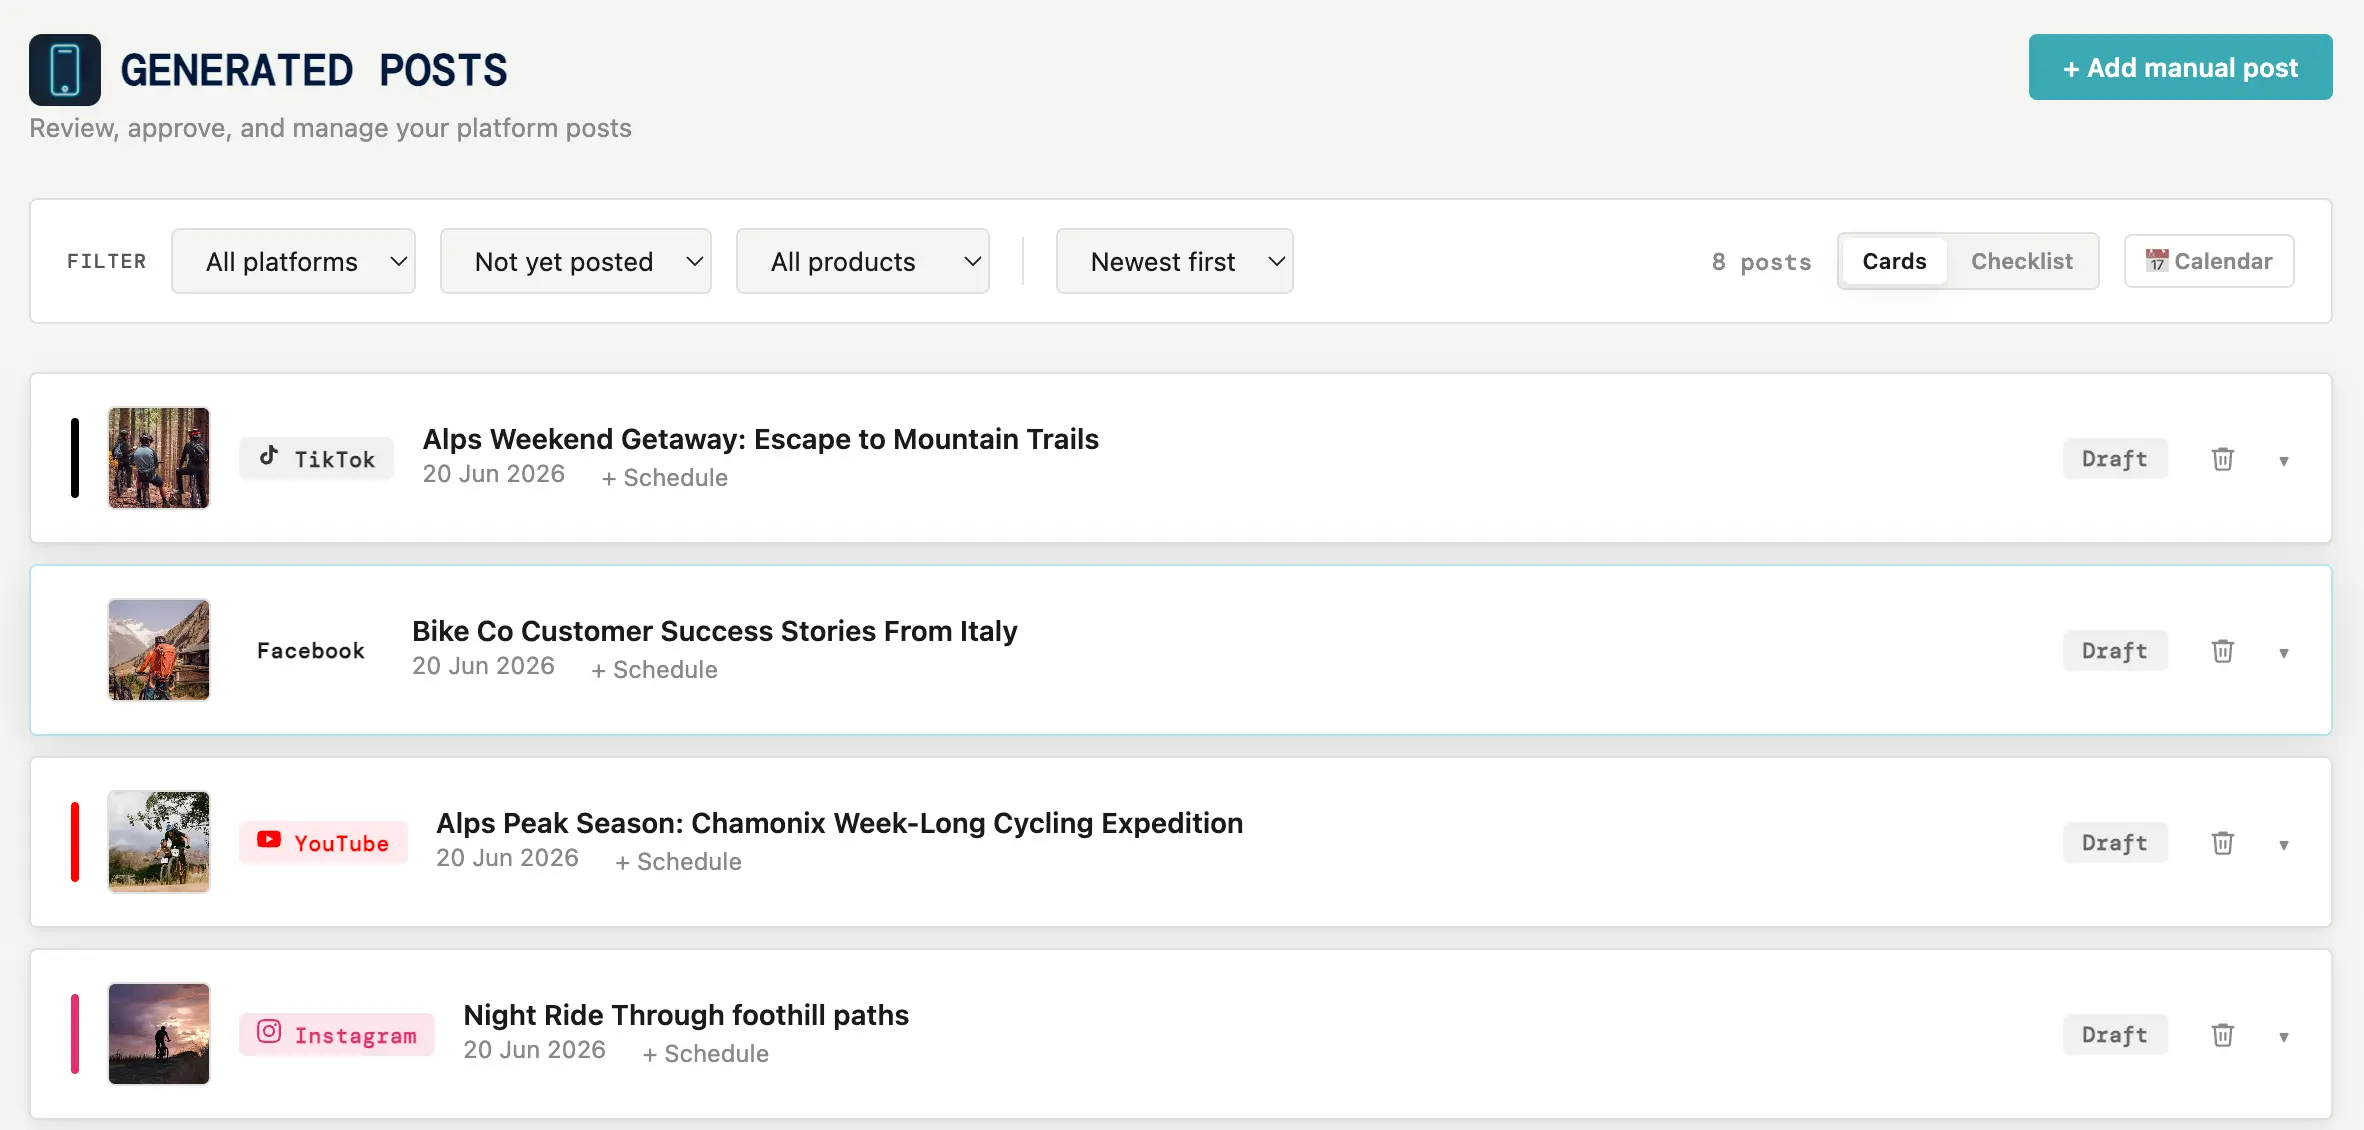
YOUR FIRST POSTOne idea, four posts
You open an idea — it starts as a Draft. You write the hook: the one line that says what the post is about. You can set a content type, choose how long the caption should be, and add negative keywords to keep the wrong footage out. When it's ready, you mark it Ready.
ContentApp then searches your tagged library, skips clips you've used recently so you don't repeat yourself, respects your negative keywords, and picks the best video and image — and tells you which it chose. You get four posts, one for each platform, in the right format and your voice.
They land on your Posts board. There you can edit a line, approve the ones you like, duplicate a post to another platform, schedule it, or mark it posted. When you mark it posted, it moves into your Vault — your record of what you've put out and, in time, how it did.
That's the whole first run. You connect once and set your words once; after that it's a small, repeatable rhythm — a hook, four posts, a quick check, posted.